

Overview
The “Secure DevOps Kit for Azure” (will be referred to as ‘AzSDK’ henceforth) is a collection of scripts, tools, extensions, automations, etc. that caters to the end to end Azure subscription and resource security needs for dev ops teams using extensive automation and smoothly integrating security into native dev ops workflows helping accomplish secure dev ops with these 6 focus areas:
1. Secure the subscription: A secure cloud subscription provides a core foundation upon which subsequent development and deployment activities can be conducted. An engineering team should have the capabilities to deploy and configure security in the subscription including elements such as alerts, ARM policies, RBAC, Security Center policies, JEA, Resource Locks, etc. Likewise, it should be possible to check that all settings are in conformance to a secure baseline.
2. Enable secure development: During the coding and early development stages, developers should have the ability to write secure code and to test the secure configuration of their cloud applications. Just like build verification tests (BVTs), we introduce the concept of security verification tests (SVTs) which can check for security of various resource types in Azure.
3. Integrate security into CICD: Test automation is a core tenet of devops. We emphasize this by providing the ability to run SVTs as part of the VSTS CICD pipeline. These SVTs can be used to ensure that the target subscription used to deploy a cloud application and the Azure resources the application is built upon are all setup in a secure manner.
4. Continuous Assurance: In the constantly changing dev ops environment, it is important to move away from the mindset of security being a milestone. We have to treat security as a continuously varying state of a system. This is made possible through capabilities that enable continuous assurance using a combination of automation runbooks, schedules, etc.
5. Alerting & Monitoring: Visibility of security status is important for individual application teams and also for central enterprise teams. We provide solutions that cater to the needs of both. Moreover, the solution spans across all stages of dev ops in effect bridging the gap between the dev team and the ops team from a security standpoint through the single, integrated views it generates.
6. Cloud Risk Governance: Lastly, underlying all activities in the kit is a telemetry framework that generates events capturing usage, adoption, evaluation results, etc. This allows us to make measured improvements to security targeting areas of high risk and maximum usage before others.

The Secure DevOps kit for Azure is here on Github

Provision Security in Subscription
· Subscription Health Scan
· Subscription Security Provisioning
· Subscription AccessControl Provisioning
· Subscription Activity Alerts
· Azure Security Center (ASC) configuration
· Subscription Security – ARM Policy
· Update subscription security baseline configuration
More information on each item can be found here on Github

Develop Security, Spot Check security via Scripts
• Security Verification Tests (SVT)
• Express Route-connected Virtual Networks (ER-vNet)
More information on these items on Github

Deploy securely from VSO Build/Release Pipeline
- Security Verification Tests (SVTs) in VSTS pipeline
- Security Verification Tests (SVTs) in Jenkins pipeline (Preview)
The AzSDK contains Security Verification Tests (SVTs) for multiple PaaS and IaaS services of the Azure platform. As we have seen so far, these SVTs can be manually run against one or more target resources held in resource groups or tagged via a {tagName, tagValue} pair. While it is invaluable to run these SVTs periodically from a PS console (to ensure that the subscription and the different resources that comprise your application are in a secure state), a key aspect of dev ops is to be able to automate such tests and integrate them as part of the dev ops workflows and release pipelines. In other words, while checking that SVTs pass in an ad hoc manner is a good practice, it is important to be able to also ensure that security control configuration remains intact in higher environments.
The CICD extensions feature of AzSDK makes automated security configuration enforcement possible by making SVTs available as a Visual Studio Extension in the Marketplace so that engineering teams can run them within build/release pipeline. Once the build/release task is configured, SVTs run against a target deployment in an Azure subscription. Upon completion, SVTs will report the pass/fail status for controls along with aggregate control results. Hereafter, all the different ‘out-of-box’ build/release workflow options from the CICD engine (e.g., VSTS) can be used as ‘next steps’ based on the outcomes of SVTs. (For instance, one can decide whether to fail the release outright or to continue despite failures while sending an email to the build/release owners or to hold progress until someone manually approves, etc. Furthermore, if all SVTs pass in the pre-prod environment, then a release can be ‘promoted’ to prod.)
Outcomes of the SVT execution can also be routed to an OMS workspace configured to receive various events generated by the AzSDK.
More information on Build / Release Pipeline

Periodically scan in production to watch for Drift
Baseline Continuous Assurance
• Overview
• Setting up Continuous Assurance – Step by Step
• Continuous Assurance – how it works (under the covers)
• Update existing Continuous Assurance Automation Account
• Remove Continuous Assurance Automation Account
• Fetch details of an existing Continuous Assurance Automation Account
• Continuous Assurance through central scanning mode (Preview) – Step by Step
• FAQ
More information on Baseline Continuous Assurance here on Github

Single Security Dashboard across DevOps Stages
OMS Solution for AzSDK
- Overview
- Components of the AzSDK OMS Solution
- Setting up the AzSDK OMS Solution (Step by Step)
- Next Steps
- Appendix
- Creating an OMS workspace
- Testing OMS connectivity
- Routing AzSDK events to OMS
- Leveraging other OMS Solutions from the Solutions Gallery
The Alerting & Monitoring features of AzSDK empower dev ops teams with the following capabilities:
a single pane of glass view of cloud security across dev ops stages
visibility to control status for their Azure subscription and critical enterprise/application resources
pre-configured search queries for creating alerts to facilitate action on security drift
Out of the box, these capabilities can be leveraged via the Operations Management Suite (OMS) solution in AzSDK.
However, a dev ops team can equally easily leverage a different system for log analytics (e.g., Splunk) and view the AzSDK control evaluation events in the alternate system. This can be accomplished by using via connectors for Event Hubs or Webhooks in the AzSDK.

More information on Security Monitoring with a Single Dashboard here on Github

Make Data-driven Improvements to Security
Overview Security Telemetry
- Control Telemetry
- Organization Level Setup
- Local Control Telemetry
- Understanding Data in App Insights
- App Insights Visualization
- Usage Telemetry
- Enable/Disable Usage Telemetry
- FAQs
The Secure DevOps Kit generates telemetry events from all stages of dev ops. That is, events are generated when an engineer runs a scan ad hoc or when SVTs are run in CICD or subscriptions are scanned via Continuous Assurance (CA). The telemetry can be collected and aggregated across an organization. When combined with other organization metadata (e.g., a mapping of subscriptions to applications or service lines or business groups), this can yield a powerful platform for supporting a data-driven approach cloud risk governance and allow organizations to drive measured and targeted security improvement initiatives in a continuous and incremental fashion (just like the rest of dev ops). The telemetry data from AzSDK can be leveraged in two key ways:
Application Insights based – called Control Telemetry (will be renamed to Org Telemetry soon). There are two ways possible. One, configure it centrally, two, configure it specifically in end-user’s machine
API based – this is a custom solution using WebAPI and SQL to collect events and enrich it with organizational metadata. This lets an organization track and drive adoption and usage of the AzSDK and provides a window into the org’s DevSecOps Maturity. API based telemetry will be release in coming months when we release documents for how organization can customize AzSDK for their needs
More on Security Telemetry you find here on GitHub

Fetch information about various AzSDK components
- Overview
- Subscription information
- Control information
- Attestation information
- Host information
This command provides overall information about the AzSDK which includes subscription information (alert/policies/ASC/CA version etc.), security controls information (severity, description, rationale etc.), attestation information (statistics, attestation justification, expiry etc.), host information (AzSDK settings/configuration, AzureRM Context etc.). ‘Get-AzSDKInfo’ command can be used with ‘InfoType’ parameter to fetch information.
More information about Get-AzSDKInfo on Github
 Start with Microsoft Azure ARM Templates
Use Microsoft Visual Studio Code to work with JSON ARM Templates and Azure subscription

Hope these Microsoft DevOps Azure Security SDK resources are helpful for your organization.

Cheers James.


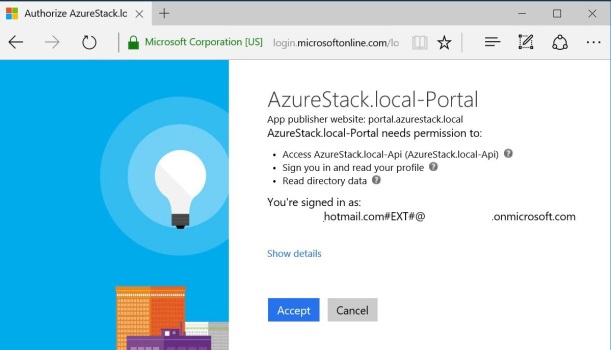 Click on Accept

