I Like to see my Blog fast for the Community with Azure AppInsights
Application Insights is an extensible analytics service that monitors your live application. It helps you detect and diagnose performance issues, and understand what users actually do with your app. It’s designed for developers but handy for a ITpro like me too, to help you continuously improve the performance and usability of your app or website 🙂
The OMS Log Analytics Forwarder enables customers to have their OMS managed devices (Windows and Linux) to send data to a central server which has access to the internet. OMS Log Analytics Forwarder is a HTTP forward proxy that support HTTP tunneling via HTTP CONNECT command. The Forwarder can handle up to 1000 OMS concurrent connected devices if run on a 4 core CPU, 8GB Windows Server with a 1Gbps network connection. In order to use the OMS Log Analytics Forwarder, you need to install the OMS agent on the Forwarder Server.
Microsoft Operations Management Suite (OMS) Dashboard Online
Lot of Enterprise Organizations do New Microsoft Projects on-premises in Datacenters installed by the IT Department or by external third party with a
Microsoft SQL instance solution configured. Before your New project is going into production for your customers, It’s very good to do a
Microsoft Operations Management Suite (OMS) SQL Assessment to see if your SQL Solution is installed and Configured well.
If you don’t have a Microsoft Operations Management Suite Plan, you can get one here
When you Login to OMS, you have to add the SQL Assessment Solution
When the SQL Assessment Solution is activated, It can take a while because the assessment has to collect data of the SQL settings.
When It’s finished collecting data you will see this on your MSOMS Dashboard :
Click on the SQL Assessment here
Here you see the SQL Assessment Dashboard
It does SQL Assessments on the following topics :
Security and Compliance
Availability and Business Continuity
Performance and Scalability
Upgrade, Migration and Deployment
Operations and Monitoring
Change and Configuration Management
Here you see Microsoft Best Practices Advice for your SQL environment, but It’s also helping you to get the job done if configuration is needed
like in this example :
So Before your New Project goes into Production state for your Customers, It’s important to get fully in Control of the best practices with #MSOMS on
your Solution.
Data disk drive configuration: All data drives must be of the same type (SAS or SATA) and capacity. If SAS disk drives are used, the disk drives must be attached via a single path (no MPIO, multi-path support is provided)
HBA configuration options: 1. (Preferred) Simple HBA 2. RAID HBA – Adapter must be configured in “pass through” mode 3. RAID HBA – Disks should be configured as Single-Disk, RAID-0
Supported bus and media type combinations
SATA HDD
SAS HDD
RAID HDD
RAID SSD (If the media type is unspecified/unknown*)
SATA SSD + SATA HDD
SAS SSD + SAS HDDExample HBAs: LSI 9207-8i, LSI-9300-8i, or LSI-9265-8i in pass-through mode
Sample OEM configurations are available.
* RAID controllers without pass-through capability can’t recognize the media type. Such controllers will mark both HDD and SSD as Unspecified. In that case, the SSD will be used as persistent storage instead of caching devices. Therefore, you can deploy the Microsoft Azure Stack POC on those SSDs.
Deploy Azure Stack POC
Before you deploy, prepare the Azure Stack POC machine and make sure it meets the minimum requirements.
Install Windows Server 2016 Datacenter Edition Technical Preview 4 EN-US (Full Edition).
Download the Azure Stack POC deployment package to a folder on your C drive, (for example, c:\AzureStack).
Run the Microsoft Azure Stack POC.exe file.
This creates the \Microsoft Azure Stack POC\ folder containing the following items:
MicrosoftAzureStackPOC.vhdx: Azure Stack data package
SQLServer2014.vhdx: SQL Server VHD
WindowsServer2012R2DatacenterEval.vhd
WindowsServer2016Datacenter.vhdx: Windows Server 2016 Data Center VHD (includes KB 3124262)
Important: You must have at least 128GB of free space on the physical boot volume.
Copy WindowsServer2016Datacenter.vhdx and call it MicrosoftAzureStackPOCBoot.vhdx.
In File Explorer, right-click MicrosoftAzureStackPOCBoot.vhdx and click Mount.
Run the bcdboot command:
bcdboot <mounted drive letter>:\windows
Reboot the machine. It will automatically run Windows Setup as the VHD system is prepared.
Configure the BIOS to use Local Time instead of UTC.
Verify that four drives for Azure Stack POC data:
Are visible in disk management
Are not in use
Show as Online, RAW
Verify that the host is not joined to a domain.
Log in using a local account with administrator permissions.
Verify network connectivity to Azure.com.
Important: Only one NIC is allowed during the deployment process. If you want to use a specific NIC, you must disable all the others.
Run the PowerShell deployment script
Open PowerShell as an administrator.
In PowerShell, go to the Azure Stack folder location (\Microsoft Azure Stack POC\ if you used the default).
Run the deploy command:
I’m running the script with Proxy settings.
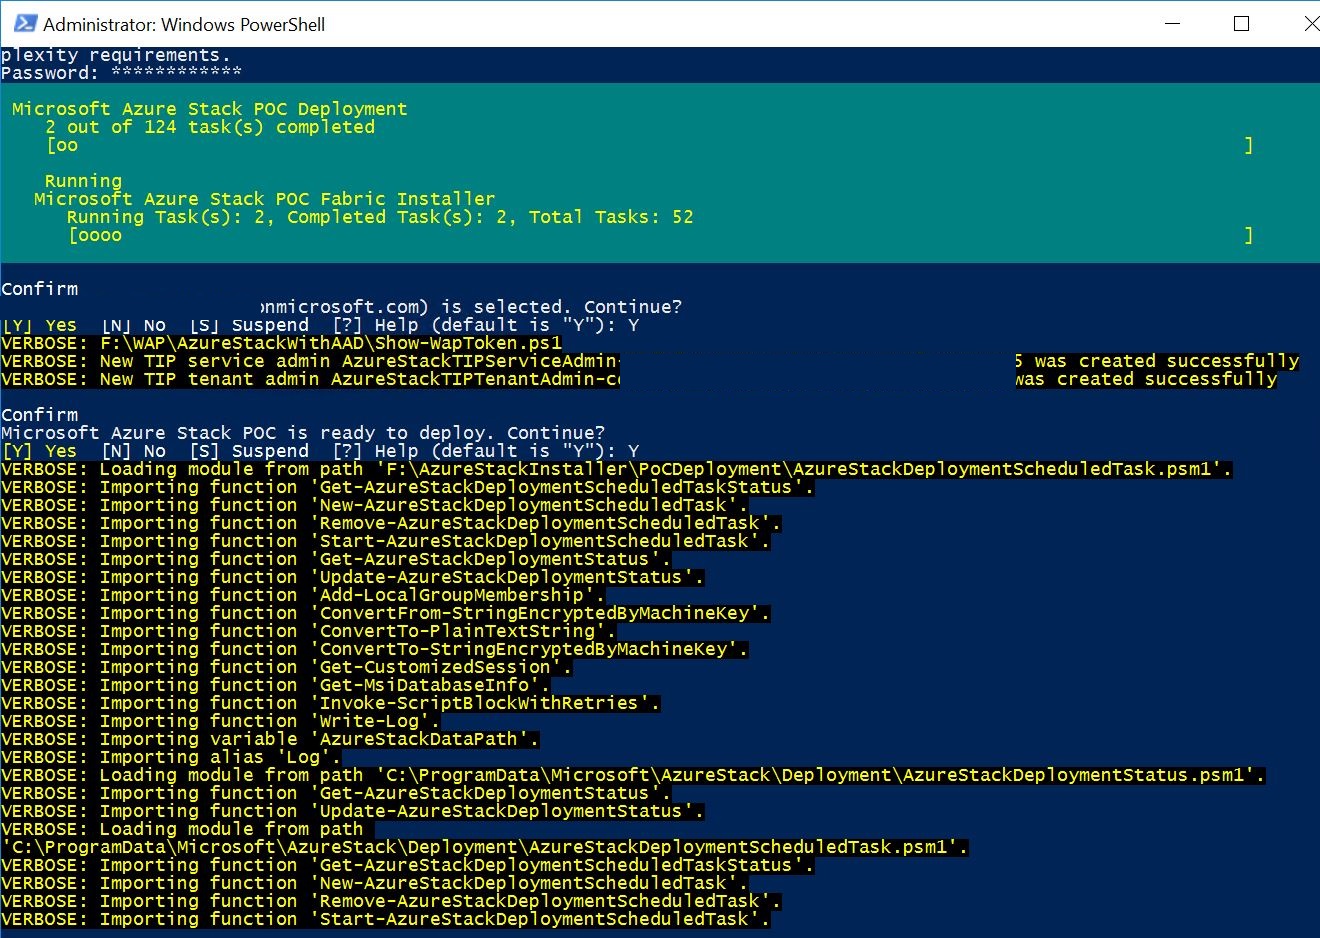
Deployment starts and the Azure Stack POC domain name is hardcoded as azurestack.local.
At the Enter the password for the built-in administrator prompt, enter a password and then confirm it. This is the password to all the virtual machines. Be sure to record this Service Admin password.
At the Please login to your Azure account in the pop-up Azure authentication page, hit any key to open the Microsoft Azure sign-in dialog box.
Enter the credentials for your Azure Active Directory Account. This user must be the Global Admin in the directory tenant
Back in PowerShell, at the account selection confirmation prompt, enter y. This creates two users and three applications for Azure stack in that directory tenant: an admin user for Azure Stack, a tenant user for the TiP tests, and one application each for the Portal, API, and Monitoring resource providers. In addition to this, the installer adds consents for the Azure PowerShell, XPlat CLI, and Visual Studio to that Directory Tenant.
At the Microsoft Azure Stack POC is ready to deploy. Continue? prompt, enter y.
The deployment process will take a few hours, during which several automated system reboots will occur. Signing in during deployment will automatically launch a PowerShell window that will display deployment progress. The PowerShell window closes after deployment completes.
On the Azure Stack POC machine, sign in as an AzureStack/administrator, open Server Manager, and turn off IE Enhanced Security Configuration for both admins and users.
There are two ways to log in to the Azure Stack POC.
Log in as a service administrator
A service administrator manages resource providers, tenant offers, plans, services, quotas, and pricing.
Log in to the Azure Stack POC physical machine.
Double-click the AzureStack.local.rdp desktop icon to open a Remote Desktop Connection to the client virtual machine. This automatically uses the AzureStack\AzureStackUser account that was created by the deployment script. Use the admin password you gave in step 5 of the script process at the Enter the password for the built-in administrator prompt.
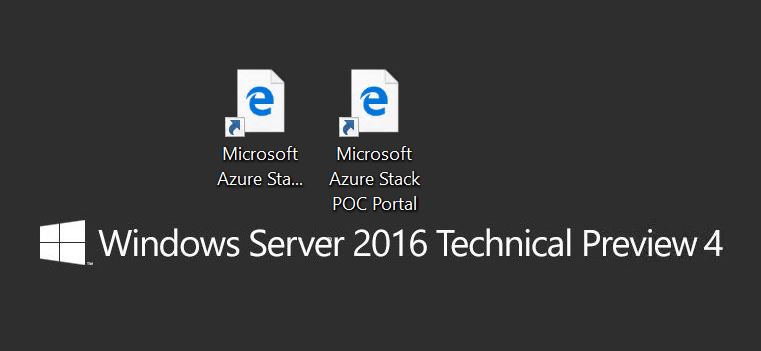
On the ClientVM.AzureStack.local desktop, double-click Microsoft Azure Stack POC Portal icon (https://portal.azurestack.local/).
Log in using the service administrator account.Click on Accept
Log in as a tenant
Tenants provision, monitor, and manage services that they subscribe to, like Web Apps, storage, and virtual machines. A service administrator can log in as a tenant to test the plans, offers, and subscriptions that their tenants might use. If you don’t already have one, Create a tenant account before you log in.
Log in to the Azure Stack physical machine.
Double-click the AzureStack.local.rdp desktop icon to open a Remote Desktop Connection to the client virtual machine. This automatically uses the AzureStack\AzureStackUser account that was created by the deployment script. Use the admin password you gave in step 5 of the script process at the Enter the password for the built-in administrator prompt.
On the ClientVM.AzureStack.local desktop, double-click Microsoft Azure Stack POC Portal icon (https://portal.azurestack.local/).
At the core of Microsoft OMS is the log search feature which allows you to combine and correlate any machine data from multiple sources within your environment. Solutions are also powered by log search to bring you metrics pivoted around a particular problem area.
On the Search page, you can create a query, and then when you search, you can filter the results by using facet controls. You can also create advanced queries to transform, filter, and report on your results.
Common log search queries appear on most solution pages. Throughout the OMS console, you can click tiles or drill in to other items to view details about the item by using log search.In this tutorial, we’ll walk through examples to cover all the basics when you use log search.
We’ll start with simple, practical examples and then build on them so that you can get an understanding of practical use cases about how to use the syntax to extract the insights you want from the data.
When you conduct log searches in OMS, you’ll use the following techniques:
Microsoft Is bringing Azure Cloud Services to Your Datacenter with Microsoft Azure Stack
Azure Stack gives you Microsoft Azure Services to run your datacenter just like a service provider. On this episode of Microsoft Mechanics, Jeffrey Snover takes an IT Pro perspective to show you how you can leverage the operational and resource management model of Azure for your datacenter on premises. Also, you’ll see how this hybrid approach gives you the flexibility to deploy apps and resources where and when you need them.
Description: This preview release of “Inside the Microsoft Operations Management Suite” is an end-to-end deep dive into the full range of Microsoft OMS features and functionality, complete with downloadable sample scripts. This early edition is being shared with the community while final edits are being completed.
The chapter list in this edition is shown below:
Chapter 1: Introduction and Onboarding
Chapter 2: Searching and Presenting OMS Data
Chapter 3: Alert Management
Chapter 4: Configuration Assessment and Change Tracking
Chapter 5: Working with Performance Data
Chapter 6: Process Automation and Desired State Configuration
Chapter 7: Backup and Disaster Recovery
Chapter 8: Security Configuration and Event Analysis
Chapter 9: Analyzing Network Data
Chapter 10: Accessing OMS Data Programmatically
Chapter 11: Custom MP Authoring
Chapter 12: Cross Platform Management and Automation
Go to Administration => Operations Management Suite => Connection => Register to OMS
Login to OMS
Select your OMS workspace and Finish.
SCOM Management Server is now Active in OMS 😉
Stay on top of your on-premises and cloud infrastructure from anywhere, anytime with the Microsoft Operations Management suite mobile app for Windows Phone, iOS, and Android. Gain 360° view of all your workloads and servers on the go.


 This VHD’s enables System Center customers to evaluate System Center 2016 Technical Preview 5 and Windows Server 2016 Technical Preview 5.


 Click on Accept


